So you may have noticed that I've done a little bit of a redesign! (I personally love it--so bright, colorful and even easier to navigate with the tabs just under the header.) Definitely look around since there's quite a few new things to see!
As I was listing races I've done in the past, I realized that I've never talked about the Crystal City Twilighter 5k that I ran in 2014. The race was a little emotional for me, so I'll go into the backstory.
In June 2014, my grandmother that I would visit for at least 2 weeks every summer was in declining health. We knew she was going to pass, and my family was basically on call. I got the chance early in the month to visit her one last time and I wouldn't have traded it for anything in the world. That entire month my running suffered because I was essentially grieving her impending death. I was already feeling the weight of the depression and grief of a world without my grandmother (there were times where I would cry in the car if a sad song came on like Pompeii by Bastille) not feeling motivated to run was difficult too. I posted on the running subreddit asking other runners what to do. The best advice I received was essentially to rest when you need to, and run when you feel like it.
Before my grandmother's health began to decline, my Dad and I signed up for the Freedom Four Miler. It was a Pacers race and a short enough distance that there wouldn't be much training involved. Then with my grandmother's impending death, the race was no longer an option. Thankfully the race organizers were sympathetic and let us transfer our entries to the Crystal City Twilighter 5k. Then the morning of the Freedom Four Miler, just two hours after my Dad and I would've finished the race I got the call I had been dreading for so long. My grandmother passed peacefully surrounded by family.
Fast forward to a month later. Race day arrived and my parents, husband and I all head to the starting area in Crystal City. It was my first night race and I remember it being very humid (it WAS July after all.) The race course itself was interesting because it was completely paved but not totally lit up. Some of the other runners had headlamps, and it helped while my eyes would adjust to the lower level of light. The course itself was nice, but with the varying amount of light it could be a little treacherous due to potholes and trash along the course. (I remember kicking a large metal ring at one point and trying to aim it so it would get out of the way of other runners.)
When I finished the race I jogged up a small hill to my Mom and husband and gave my husband and extra big hug because I wistfully thought of my grandmother as I crossed the finish line. The post-race celebration was great and you could get a free post-race beer from one of the bars by the starting and finishing area. My Dad and I decided against it and we headed home to hit the showers.
Overall, I would balk at running this race again but not because of anything Pacers did or didn't do. For me, it just isn't a great time of year or day for a race. The weather was very humid and that made running in it extra difficult. Also I discovered that with running a race at 8:30PM instead of in the morning made it difficult to fall asleep that night. The adrenaline was pumping for hours post-race and I remember tossing and turning most of the night and having trouble staying asleep. I would still recommend any other race put on by Pacers, since they do a great job from the premium to the support throughout the entire race.
Sunday, January 31, 2016
Saturday, January 23, 2016
Authenticating: Coach!
In a normal week, I go thrift shopping at least once to buy vintage Coach bags to restore and use or resell them. That being said, I see a lot of counterfeit merchandise. I've been buying vintage Coach for about a year and a half now, so I feel like I have gotten authentication down to an art form because I'm to a point where with some bags I can tell it's fake without ever even touching it.
Keep in mind, this is just a brief overview on authentication. There is a LOT that goes into it, not just the points that I mention here. These are some tips that have helped me in my hunt for Coach bags while thrift shopping. Some of it is just practice in seeing what's real and what's fake. I also recommend for specific authentication questions, visit the PurseBlog's Authentication Coach forum.
This post is pretty heavy on graphics, so if you're accessing this on a phone I apologize in advance. Authentication is all about having a keen eye for details, and it's hard to just explain without pictures.
Keep in mind, this is just a brief overview on authentication. There is a LOT that goes into it, not just the points that I mention here. These are some tips that have helped me in my hunt for Coach bags while thrift shopping. Some of it is just practice in seeing what's real and what's fake. I also recommend for specific authentication questions, visit the PurseBlog's Authentication Coach forum.
This post is pretty heavy on graphics, so if you're accessing this on a phone I apologize in advance. Authentication is all about having a keen eye for details, and it's hard to just explain without pictures.
If the bag has a buckle, it should look like this:
 |
| This buckle is square and the edges are totally rounded. |
 |
| Sometimes the buckle is rounded but flat backed, but other times there is a little bump where the buckle attaches to the bag. |
If the buckle is flat like this:

Turnlocks are Coach's signature design closures for their bags. They were first used by Bonnie Cashin in the 1960s and are still used in Coach products today with slight design modifications. On vintage bags, the part that actually turns should be nice and rounded like this:

If the turnlock is kind of chunky or blocky looking like this:
Or even like this:

or rectangular like this...
 |
| It's fake. (This one is actually also a great example of 2 different tones of hardware too, which is also an indicator of a fake bag!) |

If the turnlock is kind of chunky or blocky looking like this:
 |
| It's fake. |
 |
| It's also fake. |
The underside of the turnlock is also a good indicator of authenticity. It should be flat and smooth like this:

Or like this:
But if it looks like this:
There are also some easier ways to spot a fake. For example, read the stamped creed inside the bag! Sometimes there will be typos (grammatical and misspellings) and other times no creed at all. There is a fair amount of variety to the creeds depending on the age of the bag itself. The oldest bags simply have a tiny metal plate that says "Coach" or a little stamp that says it.
The format of the serial numbers started at seven digits as XXX-XXXX then later moved to XXXX-XXX. They have NEVER been shorter than that and since about the mid-2000's have only gotten longer. Bags with short serial numbers (5 or 6 digits) are usually made in Korea, which is another giveaway a bag is fake. So many fake Coach bags have come out of Korea that Coach will probably never actually do any bag manufacturing in that country. Coach bags are/were however made in the United States, Costa Rica, Italy, China, Hungary, Mexico and the Dominican Republic. Each area has a slightly different texture to the leather. For example, the older United States bags are very thick and durable, while Costa Rican leather is slightly thinner and smooshy. (Some collectors have a preference when shopping for vintage bags.) Bags in Italy are typically pebbled leather, similar to Dooney handbags. (More on authenticating Dooney in another post!)
Like I said before, this is just a quick overview on how to authenticate. Hopefully it helps you in your search for a vintage (or new) Coach bag! If you have any questions, do not hesitate to leave a comment below. I also recommend looking into the PurseForum's Coach authentication message board. They have a lot of experts who spend their spare time authenticating bags and are awesome at it!

Or like this:
 |
| This is from a briefcase and it should look EXACTLY like this. |
 |
| Or has grooves by the prongs from the front of the turnlock similar to this, it's fake. |
The format of the serial numbers started at seven digits as XXX-XXXX then later moved to XXXX-XXX. They have NEVER been shorter than that and since about the mid-2000's have only gotten longer. Bags with short serial numbers (5 or 6 digits) are usually made in Korea, which is another giveaway a bag is fake. So many fake Coach bags have come out of Korea that Coach will probably never actually do any bag manufacturing in that country. Coach bags are/were however made in the United States, Costa Rica, Italy, China, Hungary, Mexico and the Dominican Republic. Each area has a slightly different texture to the leather. For example, the older United States bags are very thick and durable, while Costa Rican leather is slightly thinner and smooshy. (Some collectors have a preference when shopping for vintage bags.) Bags in Italy are typically pebbled leather, similar to Dooney handbags. (More on authenticating Dooney in another post!)
Like I said before, this is just a quick overview on how to authenticate. Hopefully it helps you in your search for a vintage (or new) Coach bag! If you have any questions, do not hesitate to leave a comment below. I also recommend looking into the PurseForum's Coach authentication message board. They have a lot of experts who spend their spare time authenticating bags and are awesome at it!

Wednesday, January 20, 2016
Thrifting tips!
I figured it was about time for me to post some tips about thrift shopping. It can be difficult, but with these tips it can be a little easier.
- Give yourself plenty of time. Sometimes it takes a lot of digging to find the good stuff. Some thrift stores will actually pull out the high ticket items and keep them separate from mass market brands with high product turnover (think: Old Navy, Hanes, Basic Editions, Faded Glory, Mossimo, etc.) These brands are not necessarily made to last, and they crank out new items in several colors a few times a month so their main focus is getting product out the door. Going through the massive racks of everything else is still worthwhile, because things do get misplaced.
- Familiarize yourself with clothing brands you like in terms of logos and their placement. This helps me find a lot of great clothing by Athleta, Lululemon, Patagonia, Lucky Brand Jeans, etc. It helps get through clothing a LOT faster since you don't necessarily have to look around for a sewn in tag. And it helps with authenticating items as well. A lot of fake handbags and shoes end up in thrift stores. (More on this in another blog post!)
- Also keep in mind that some clothing brands are weird about tags. Some companies like Under Armour and Lululemon make rip away tags so a lot of the time it can be hard to find the size of a shirt or pair of pants. If this is the case, I recommend checking any pockets since some companies will even print the size there to avoid tags altogether.
- Just like real estate, location matters. I live in an area with stores that I like, but can't necessarily justify spending a lot for it (like $100 for yoga pants.) When I lived in Blacksburg, VA there was no way I was going to find the same brands that I find here in central Maryland. While thrifting there I found obscure older items like a Degrassi VHS tape and 5.25'' disks. And trash. Seriously. (That being said, I keep a large bottle of hand sanitizer in my car and a smaller one in my purse.)
 |
| Seriously? Pasta sauce jars and somebody's used neti pot? Gross! |
- Learn when to move on. I give thrift stores a couple chances to wow me, and if not I stop going there. But I know where to go to if I'm looking for something specific (like vinyl records) but others I don't bother going to because I know it would take more effort than other stores.
- Get there soon after opening. I go out thrift shopping one day a week and I get to the first place within the first half an hour of opening. No matter the weather. The only things that keep me away are federal and school holidays (because it is extra busy) and super bad weather where you shouldn't even think about leaving the house.
- Case in point: Monday was Martin Luther King Day so the kids were out and it was a federal holiday so I didn't bother even thinking about going out. Here in Maryland we're expecting our first BIG winter storm of the season on Friday. So while everybody is out shopping for French toast supplies, I'll be out thrifting because I got all my grocery shopping done earlier in the week.
Friday, January 15, 2016
Wrapping up 2015!!
Since it's still early 2016, I thought it would be the perfect time to recap 3 races from 2015 I haven't talked about yet. (Two of which I've signed up to run for a second time.) I've figured out most of my race schedule for this year and I'm starting to get REALLY excited for what's in store race-wise. I'm signed up for 6 long(ish) distance races--3 half marathons, 2 10 milers and a 12 miler! (Along with some short races here and there too.) But for now, the recaps!
St. Patrick's Day 5k
I ran this one with my parents and husband last year. I had been fighting a cold all week and I learned my lesson: If you have a respiratory illness, do NOT push yourself during a race. We went out to eat at Family Meal for a late lunch afterwards, and I only ate half my sandwich. I eat a LOT, especially post-race and this was totally unusual for me. Once we got back home I showered, put on some sweats and slept off the cold for the rest of the afternoon.
The race was a lot of fun despite fighting the cold. It was a little crowded, but not horrible. We arrived super early (about an hour before it was scheduled to start) so we got to see a lot of people leaving Sunday church services and watch final race preparations. This race is actually small enough that I felt like we could've taken our time getting there. There weren't any portajohns at the start, but there were a few restaurants that we could've used if needed.
The race itself is mostly downhill for the first mile, then totally flat. (Keep in mind though, this is a normally busy street so DEFINITELY look out for bumps and potholes!) It mostly takes place around the Inner Harbor and goes down by Federal Hill and past the American Visionary Art Museum which is always fun to see. It ends at Power Plant Live, similar to the Charles Street 12. I've already signed up to do the B3 Challenge again this year, and this is the first race in the series. (This race typically sells out, so if you're interested in running it sign up sooner rather than later! Also, if you sign up for this one then decide to join the B3 you can just email the race organizers and they'll help you out.)
The premium was pretty nice--a bright green Brooks long sleeved tech shirt! I still wear it every once in awhile.
Sole of the City 10k
I ran this one with my Dad (in a matter of speaking...We at least started together.) This second race in the B3 challenge race series starts and finishes at Fort McHenry Row, which is the home for Charm City Run's Baltimore location. The race is fairly hilly, but nice. It actually helped me figure out where to run around the Inner Harbor. Some of the areas are fairly narrow but not too bad. There are some parts that go through cobblestone so you have to be careful, but they keep these areas of the course to a minimum. I found it to be fairly hilly until you got back to the Inner Harbor, which is pretty normal for Baltimore races in general. (What a lot of people don't realize is that up from the harbor, Baltimore is VERY hilly.) I loved running directly in front of the aquarium since I volunteer there in three different areas. I got to high five one of the security guards I see regularly on my shifts, and later I found out that one of the people in an exhibit I help with was there cheering on everybody.
The post-race support was awesome. Afterwards there were long rows of tables filled with sandwich wraps and other grab and go snacks like pretzels and granola bars. The Greene Turtle (a chain of bars in Maryland) provided the runners with post-race beer.
I loved the premium for this race--an Under Armour Kaleidelogo hoodie. It's fairly lightweight, and the logo for the race was embroidered on the back and a Charm City Run logo on the front. It's one of the few premiums I wear regularly.
Cinco de Miler
This was my first trail race and I really enjoyed it! If you've run the Across the Bay 10k, you've already been very close to where the race starts and finishes. (It's basically on the other side of the office buildings by the finishing area for the 10k, which is actually a park!) The packet pickup was a breeze since it was at the Annapolis Charm City Run, and beforehand there was a free yoga class. So I got up early, did some yoga, then got my shirt and bib. (The logo is really cute--it's a great blue heron wearing a sombrero and holding maracas!)
This is probably one of the few races where you run on every possible terrain--you start on pavement, then a wooded dirt path, a field, a small wooden bridge and through sand! I liked the challenge of changing my stride and really having to strategize about how to run on each terrain. (I've run on all of the terrains before, but never all in the same course.)
Afterwards, my husband and I drove over to the parking area for the park itself and spent part of the morning on the beach. It was a lovely day for it too--sunny and just slightly warm. The small beaches didn't have very many people on them, and we spent a few minutes sitting on a washed up log before we headed to DC to cheer on my Dad at his first marathon and stopped at Red, Hot and Blue just on the other side of the Bay bridge.
St. Patrick's Day 5k
I ran this one with my parents and husband last year. I had been fighting a cold all week and I learned my lesson: If you have a respiratory illness, do NOT push yourself during a race. We went out to eat at Family Meal for a late lunch afterwards, and I only ate half my sandwich. I eat a LOT, especially post-race and this was totally unusual for me. Once we got back home I showered, put on some sweats and slept off the cold for the rest of the afternoon.
The race was a lot of fun despite fighting the cold. It was a little crowded, but not horrible. We arrived super early (about an hour before it was scheduled to start) so we got to see a lot of people leaving Sunday church services and watch final race preparations. This race is actually small enough that I felt like we could've taken our time getting there. There weren't any portajohns at the start, but there were a few restaurants that we could've used if needed.
The race itself is mostly downhill for the first mile, then totally flat. (Keep in mind though, this is a normally busy street so DEFINITELY look out for bumps and potholes!) It mostly takes place around the Inner Harbor and goes down by Federal Hill and past the American Visionary Art Museum which is always fun to see. It ends at Power Plant Live, similar to the Charles Street 12. I've already signed up to do the B3 Challenge again this year, and this is the first race in the series. (This race typically sells out, so if you're interested in running it sign up sooner rather than later! Also, if you sign up for this one then decide to join the B3 you can just email the race organizers and they'll help you out.)
The premium was pretty nice--a bright green Brooks long sleeved tech shirt! I still wear it every once in awhile.
 |
| Front of the St. Patrick's Day 5k shirt plus a reflective Brooks logo on the sleeve! |
 |
| Back of the St Patrick's Day 5k shirt |
Sole of the City 10k
I ran this one with my Dad (in a matter of speaking...We at least started together.) This second race in the B3 challenge race series starts and finishes at Fort McHenry Row, which is the home for Charm City Run's Baltimore location. The race is fairly hilly, but nice. It actually helped me figure out where to run around the Inner Harbor. Some of the areas are fairly narrow but not too bad. There are some parts that go through cobblestone so you have to be careful, but they keep these areas of the course to a minimum. I found it to be fairly hilly until you got back to the Inner Harbor, which is pretty normal for Baltimore races in general. (What a lot of people don't realize is that up from the harbor, Baltimore is VERY hilly.) I loved running directly in front of the aquarium since I volunteer there in three different areas. I got to high five one of the security guards I see regularly on my shifts, and later I found out that one of the people in an exhibit I help with was there cheering on everybody.
The post-race support was awesome. Afterwards there were long rows of tables filled with sandwich wraps and other grab and go snacks like pretzels and granola bars. The Greene Turtle (a chain of bars in Maryland) provided the runners with post-race beer.
I loved the premium for this race--an Under Armour Kaleidelogo hoodie. It's fairly lightweight, and the logo for the race was embroidered on the back and a Charm City Run logo on the front. It's one of the few premiums I wear regularly.
 |
| Race logo on the back of the hoodie |
 |
| The front of the hoodie, showing the Charm City Run logo and Greene Turtle logo. (The Greene Turtle is a Maryland chain of bars that sponsored the race and provided post-race beer!) |
Cinco de Miler
This was my first trail race and I really enjoyed it! If you've run the Across the Bay 10k, you've already been very close to where the race starts and finishes. (It's basically on the other side of the office buildings by the finishing area for the 10k, which is actually a park!) The packet pickup was a breeze since it was at the Annapolis Charm City Run, and beforehand there was a free yoga class. So I got up early, did some yoga, then got my shirt and bib. (The logo is really cute--it's a great blue heron wearing a sombrero and holding maracas!)
 |
| So cute!! |
 |
| The race benefits the Midshore Conservancy and the post-race party was at the Jetty restaurant and dock bar. |
Afterwards, my husband and I drove over to the parking area for the park itself and spent part of the morning on the beach. It was a lovely day for it too--sunny and just slightly warm. The small beaches didn't have very many people on them, and we spent a few minutes sitting on a washed up log before we headed to DC to cheer on my Dad at his first marathon and stopped at Red, Hot and Blue just on the other side of the Bay bridge.
Sunday, December 20, 2015
Celtic Solstice 5 Miler Race Recap or How I Learned that Yes, You CAN Oversell a Race!
I really wanted to like this race. Honestly, I did. When I found one of the premiums from 2013 that I had seen from various area running events and when I found one while out thrifting, I KNEW I had to do this race. (I don't like wearing running swag from races I haven't actually run.)
I also kept an eye out for the multiple emails from the race organizer. Rather than having a website or a Facebook page, the organizer sent out multiple, verbose emails throughout the week. They made it known that you should plan on getting there early since parking fills up quickly. (And it did shortly after my husband and I got there at 7:25am for the 8:30am gun time.)
We then followed the crowds and made our way to the starting area. After a portajohn stop, I saw how crowded the tent was and sighed. It was like trying to get through a crowded metro train after a Redskins game lets out: Next to impossible and completely frustrating. But after paying attention to the emails, I knew I had no choice because I had to get the timing chip for my shoe. Which naturally, was in the furthest corner of the tent and getting through the crowd took and was incredibly difficult because people were trying to put on their bibs, get their premium and the put the timing chip on their shoe. Somehow after getting the chip I found a space open enough that I could bend down and put the chip on. Then the next order of business was to find some of Zeke's coffee. After having to brave the crowds, we decided not to go back into the tents and drank our coffee outside then I made my way to the starting area in front of Stieff Silver.


 |
| Front of the 2013 pullover |
 |
| Back of the 2013 pullover |
 |
| A closeup of the 2013 logo |
I heard from many people that it's a fantastic race and they were sorry to miss out on it for whatever reason. I may sound like a curmudgeon, a Scrooge, even. I love Christmas races, but this one was WAY oversold and because of that this may be one of the few races I'm not sure I would consider running again.
The packet pickup was fairly easy. It was held in the basement at the Falls Road Running Store in Baltimore. It is probably the smallest running store I have ever been in, and people brought their small children with them. So in addition to trying to squeeze through already fairly tight quarters to get to packet pickup, you had to dodge small children running around. I grabbed my premium, my bib, and the extra jacket from last year's race that I bought for $20. I was SO excited because the premium for the race was so pretty. I love the color and the pattern on the back. That alone made the $70 race fee worth it in my mind. (The premium retails for about that much too!) And although I went to the early packet pickup, they did not include the actual timing chip for the race itself--that had to be picked up on race morning.
 |
| The front of the 2015 pullover |
 |
| The 2015 race pullover! It's a Brooks Dash 1/2 zip. |
 |
| Front of 2014 jacket |
 |
| Back of the 2014 jacket |
 |
| Closeup of the 2014 logo |
I kept a close eye on the weather which had been beautiful all week. (I even ran in a tank top and shorts comfortably on the day I picked up my packet!) But as luck would have it, a cold front came in the day before the race so it was below freezing and windy on race morning.
I also kept an eye out for the multiple emails from the race organizer. Rather than having a website or a Facebook page, the organizer sent out multiple, verbose emails throughout the week. They made it known that you should plan on getting there early since parking fills up quickly. (And it did shortly after my husband and I got there at 7:25am for the 8:30am gun time.)
We then followed the crowds and made our way to the starting area. After a portajohn stop, I saw how crowded the tent was and sighed. It was like trying to get through a crowded metro train after a Redskins game lets out: Next to impossible and completely frustrating. But after paying attention to the emails, I knew I had no choice because I had to get the timing chip for my shoe. Which naturally, was in the furthest corner of the tent and getting through the crowd took and was incredibly difficult because people were trying to put on their bibs, get their premium and the put the timing chip on their shoe. Somehow after getting the chip I found a space open enough that I could bend down and put the chip on. Then the next order of business was to find some of Zeke's coffee. After having to brave the crowds, we decided not to go back into the tents and drank our coffee outside then I made my way to the starting area in front of Stieff Silver.

About 15 minutes later they started the mini-parade of the Irish Wolfhounds, bagpiper and the people who have done the race every year since it started (signified by their single digit bib numbers.)

Soon after the mini-parade, we were off. The course starts out uphill for about the first quarter mile. It can be steep to some, but it was manageable. The hills for this race are definitely rolling until the very end when you go back down that first hill. (They keep it this way since winter weather can be very unpredictable and this race is always held even if it snows.) It was a very pretty course since it goes through Druid Hill Park and around Druid Lake. However, it can also be VERY narrow at times.
(Warning: Here's where I start ranting!)
I've been in races where you have maybe a car lane width to pass through for a short period of time. This one though squeezed down to less than that at times. And with nearly 3,000 runners (2,711 finishers to be exact) it gets VERY tight at times. I lost count of how many times I nearly got hit in the face, tripped over people or got boxed in by people running at a slower pace than me or simply walking. Like I said before, I've heard wonderful things about this race and obviously many other people have too. But there is such a thing as having too many runners, and this race obviously did. The organizers began to sell out of race premiums in early November, and in my mind that is when they should've started cutting off registrations. After they ran out of the race premiums, they allowed people to keep registering for $40 until race morning and you would have the option to buy the previous year's jacket and whatever was still left from this year's race. I understand that race organizers want as many people as possible to be able to run a race--but there is also a benefit to saying "no" to people after a certain point. There were just simply too many people for the size of the course.
(End of rant.)
The post-race food was awesome--perfectly ripe bananas, water, coffee, wassail and an incredible spread of cookies. I grabbed one of each kind and almost all of them were gone by the time I made it back out of the tent. I also stopped by the Brooks booth and grabbed a free lip balm on my way out.
All of that being said: Would I run this race again? Maybe, but with reservations. The premium was fantastic and is something I know I'll wear often since it's lightweight and I love this year's logo for the race. (The logo changes almost every year, and occasionally they bring back old ones.) Despite the crowding on the course, I still had a decent time (according to my Garmin it was 54:01, pace of 10:31) and my pace was about 30 seconds faster than on my 5 mile training run the previous weekend. It was very frustrating to have to dodge so many people on the course itself, so if I were to run this race again I would make it a point to run just to the side of it to have fewer people to go around (although at some points this can be difficult.) I think I also have to go in with the mentality that going through the tent will be like going through the mosh pit at a popular concert. If I like the design of the logo enough, I will definitely consider it. But I will definitely not drag my husband along. (He runs occasionally but not often and we made a deal after he skipped coming to the Jingle All the Way 5k that he had to come to this one.)
Have you run this race? What are your thoughts on it? I'm open to discussion about it. What are your thoughts on races only allowing so many people run it? Is there such a thing as too many runners?
Wednesday, December 9, 2015
Bib Holder Tutorial
Here is part 2 of my race swag display tutorials! This tutorial will show you how I made my bib holder.

Materials:
4- 1 inch square bend screw hooks
I then filled in the border and the "Running" portions of the board and screwed the hooks back in.
The next part is fairly easy, and it's attaching the hanging system for the plaque. If you use the D-ring hanger and picture wire, you just have to screw the d-ring hangers on the left and right sides of the back of the plaque. You don't have to worry about them being even because when you add the picture wire, it will help keep the plaque even when hanging. You want to clip a little extra on each end of the wire to allow yourself some room to twist it around on itself like this...
And now you're done! Congrats :) If you decide to try my tutorial let me know what you thought and I would love to see pictures of your work! Also feel free to ask questions if I'm not clear about something.

Materials:
4- 1 inch square bend screw hooks
single hole punch
This template (not necessary, but if you're using the other parts of this tutorial it makes things easier!)
This template (not necessary, but if you're using the other parts of this tutorial it makes things easier!)
acrylic paint in your favorite color(s)
paint brushes (these aren't the ones I used, but would work well!)
Your favorite picture hanging product (you will need something to attach to the back. You can use 1 sawtooth hanger, or 2 d-ring hangers and picture wire.)
The bib plaque is similar to the medal plaque, but with an extra couple steps for putting in the hooks.
To install the hooks:
paint brushes (these aren't the ones I used, but would work well!)
Your favorite picture hanging product (you will need something to attach to the back. You can use 1 sawtooth hanger, or 2 d-ring hangers and picture wire.)
First, you can paint the boards or jump right in with transferring the words onto the plaques. I found transferring the words first went a lot faster since I didn't have to wait for the paint to be completely dry.
For both parts of the tutorial, I chose to transfer the letters first.
To install the hooks:
If you're using the same rectangular plaque I did with the lettering on the left you will want the smaller set of screw hooks to be .75'' from the top of the board, and one at 3.25'' from the left, and the second at the 10'' mark. For the larger set, you want this to be 1.25'' from the top, with the third screw hook being at the 2.5'' mark, and the fourth at the 10.75'' mark.
 |
| While measuring I used a pencil to make a mark. I recommend erasing it as much as you can, but don't expect it to go away completely. I was able to cover it up with the paint. |
 |
After checking my measurements pressed the screw hooks in to make an indentation for where I would install the screw hooks. (The wood is soft enough that you shouldn't need any hardware to do this part.)
|
 |
| Then once again I painted around the indentations. Shortly after this I removed the bent screw hooks to make painting easier and to keep them clean. |
 |
| I then checked to be sure my bibs fit. This is where the hole puncher comes in handy, since not all bibs will fit perfectly. Just use the hole puncher to make the holes slightly bigger or move them further out as needed. Also note that for some bibs, you will need to remove larger timing chips. To do this you can snip away at it using scissors. |
 |
| I then transferred the smaller of the "Running" templates to the side of the plaque using a metal tipped pen similar to the medal holder tutorial. |
 |
| This is how it looked after painting the whole board. |
 |
| And you're ALMOST done! |
 |
| Don't do like I did and allow yourself at least an inch on each side of the hangers so you have plenty to twist around on itself. |
Tuesday, December 8, 2015
Medal Holder Tutorial
I know I kept saying that this tutorial is coming, but now that I've given one of the sets away as a birthday present to my Dad I can show what I did along with links to the specific products. To break it up a little bit, here is the medal holder tutorial. Tomorrow I will post the bib holder tutorial!

After I was done painting, my husband offered to drill holes to make the screw hooks go in cleaner.
The last step is installing the d-ring hangers and attaching the wire between the two hangers. You just need to screw in the hangers on the left and right sides of the plaque and then use the wire to attach the two. (Be sure to allow yourself at least 2 extra inches so you can twist the wire on itself.) When you're done, the back should look something like this...

And now you're done! To add your medals just slip the cafe curtain rod off the hooks and thread the strap of the medal onto the rod. And since the cafe curtain rod is expandable you should have no problem using this plaque for a long time.

Here's what I used:
acrylic paint in your favorite color(s)
paint brushes (these aren't the ones I used, but would work well!)
This template
1 cafe curtain rod
2 #8 Screw Hooks (Note: If you buy these in store you can buy 1 package of two for about $1.18. The link is for a package of 25!)
Your favorite picture hanging product (you will need something to attach to the back. You can use 1 sawtooth hanger, or 2 d-ring hangers and picture wire.)
1 cafe curtain rod
2 #8 Screw Hooks (Note: If you buy these in store you can buy 1 package of two for about $1.18. The link is for a package of 25!)
Your favorite picture hanging product (you will need something to attach to the back. You can use 1 sawtooth hanger, or 2 d-ring hangers and picture wire.)
First, you can paint the boards or jump right in with transferring the words onto the plaques. I found transferring the words first went a lot faster since I didn't have to wait for the paint to be completely dry.
For this one, I transferred the letters first then started painting.
 |
| The top of the page for this one lines up perfectly. I had it about half an inch from the top of the board. |
 |
| I then used a metal tipped pen to trace the template while pressing into the wood to make an indentation. |

 |
| This is what you should have afterwards (if you don't paint first.) |

 |
| If you chose to transfer the letters first, now you should paint the background color around the indentations. |

 |
| Here's how it looks after outlining the indentations. |

 |
| Then paint the rest of the background color to fill it in. |

 |
| Then paint the second color in the lettering. |

 |
| It's not perfect, but still looks great! |

 |
| Painting the border. |

 |
| Painting is done for the medal plaque! |
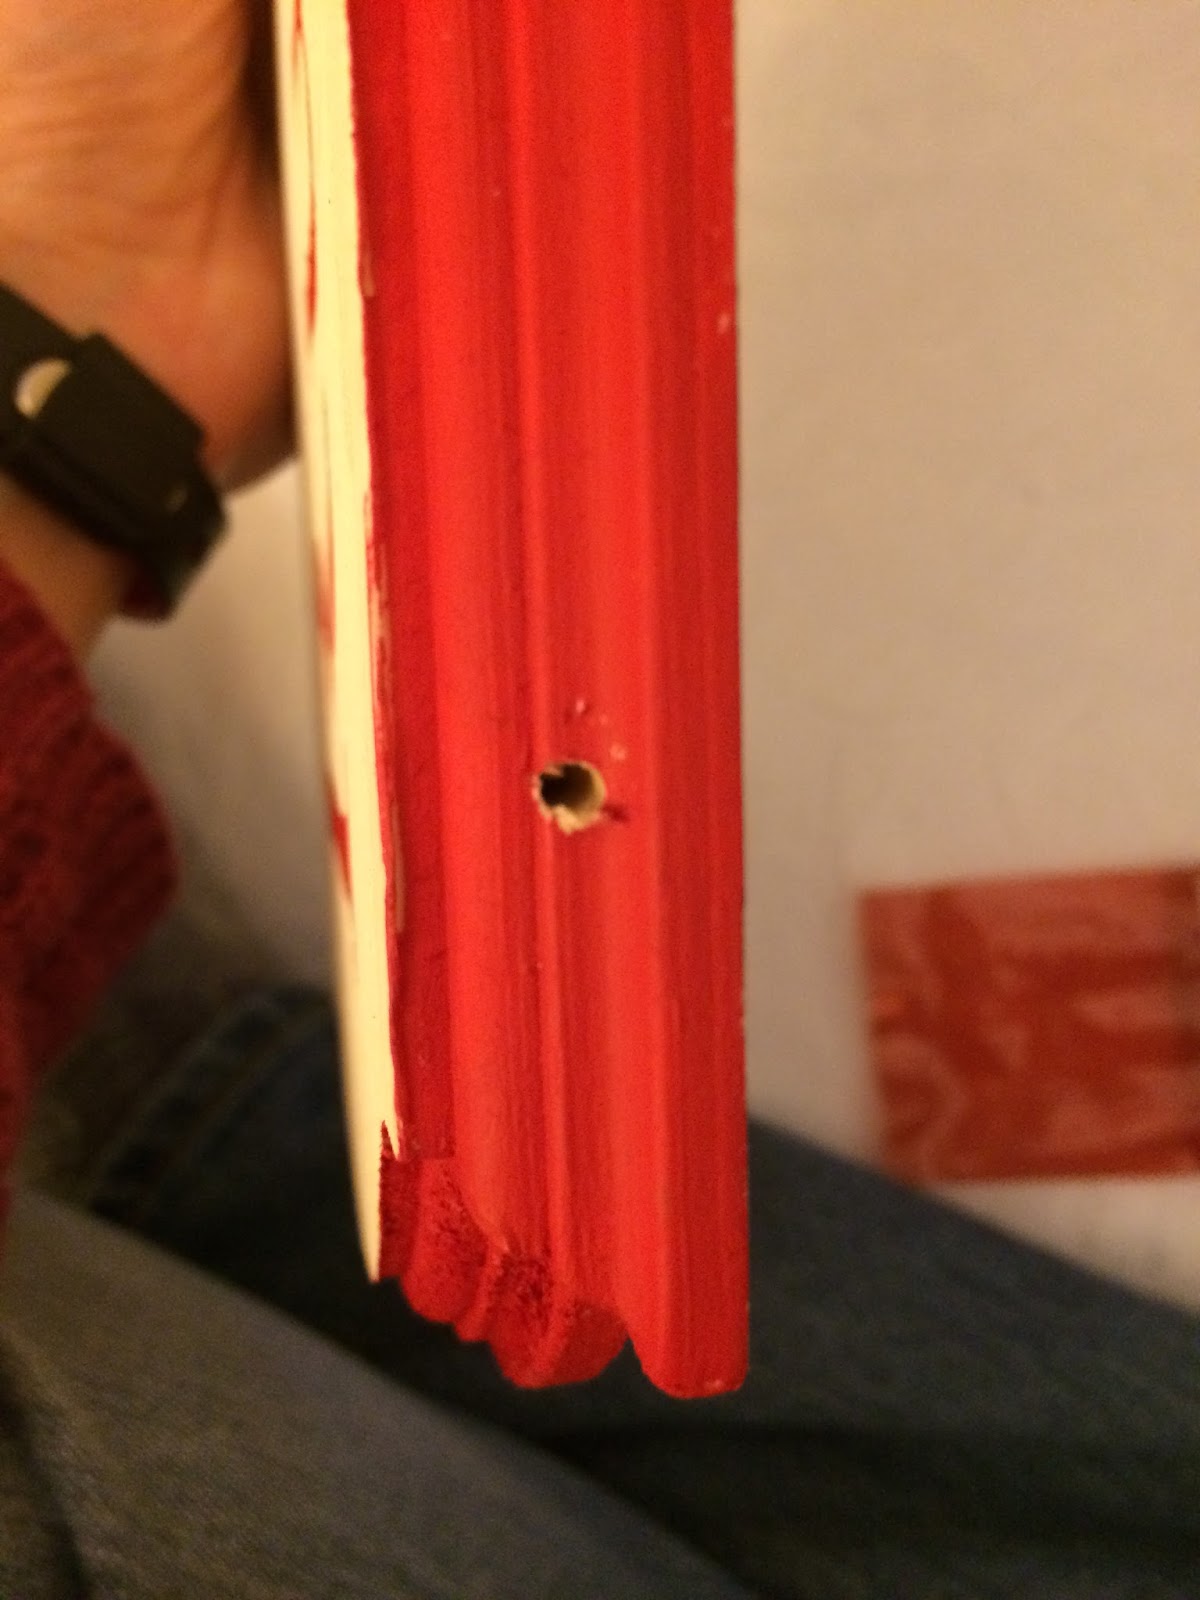 |
| The holes are approximately one inch from each bottom edge. |
 |
| Then screw in each of the hooks. I was able to start them by hand, but then used pliers to get them in further without hurting my fingers. |
 |
| Once the screws were in, I attached the cafe curtain rod and it's almost done! |

And now you're done! To add your medals just slip the cafe curtain rod off the hooks and thread the strap of the medal onto the rod. And since the cafe curtain rod is expandable you should have no problem using this plaque for a long time.
Subscribe to:
Posts (Atom)